 Having rambunctious 4 and 1 1/2 year old boys makes any decor a *fun little challenge*. Pretty much anything I care about needs to be either plastic or above 4 feet. Although frustrating, I realize that this is a very short time in my life and adjusting to new things is an adventure if I let it be.
SO, with Pinterest at my side, I dive into the world of plastic and high up decoration into the holiday season!
Every year getting Ben to bring in the Christmas decoration is a struggle. My little Scrooge likes the house once it’s decorated but carrying all the boxes inside the house is never a quiet task. I usually whine for a few days, beg, threaten and finally start to do it myself which makes him loudly sigh and begrudgingly climb up the ladder into the attic. 
Because of last year, (curious cats and a curious 3-year-old) I needed some new ornaments so I headed to a Sears nearby. Usually if I need Christmas decor I’ll go to Walmart, Hobby Lobby or Pier One but since Bear wanted to go to the mall and Ben wanted to shop appliances and craftsman tools or something, we headed to Sears.
I distractedly shopped the Kardashian collection as we strolled through, glanced at bedding and meandered into the Christmas section. They had it set up really cute! There was a little path with fake snow and Bear LOVED it -OK- I’ll just show a picture. 
 Here are some more pictures from my shop- HERE.
I picked out a large bow and bunch of ornaments for my project- they had a good selection of them, not a huge one like some other stores but I found what I was looking for… also, when I checked out I was surprised and excited to learn that they were 50% off!!! and it wasn’t even Black Friday!
I love fun, easy DIY projects and was so excited to start on this one!
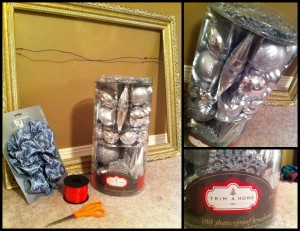
For this you will need:
1 old frame
Twine or ribbons (I lost my twine so red ribbons it was!)
1/2 dozen of your favorite ornaments or ball ornaments- SHATTERPROOF is good!
1 large bow (This looked SILVER in the store- it looks BLUE in the picture! I may exchange it for either a silver one or a red one.)
Step One:
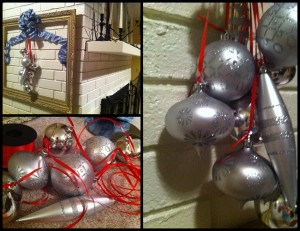
With the twine or ribbons tie the tops of the ornaments at different lengths. Depending on size, about a half-dozen is good.
Step Two:
Carefully (especially if they are glass ornaments!) gather them into a bunch and make sure they are at different lengths and tie together. Secure to the back of the frame by looping around and knotting. (depends on the weight.)
Step Three:
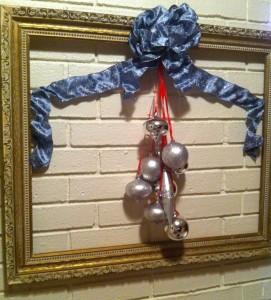
Secure the bow under the top of the picture frame then hang the picture frame on the wall! DONE!
With the rest of my ornaments I plan to continue to decorate around my house, especially as I get my Scrooge to get the boxes of decorations down from the attic! 
This shop has been compensated as part of a social shopper insights study for Collective Bias. #CBias But all thoughts and opinions are 100% my own!!!


